
Sauces & Condiments
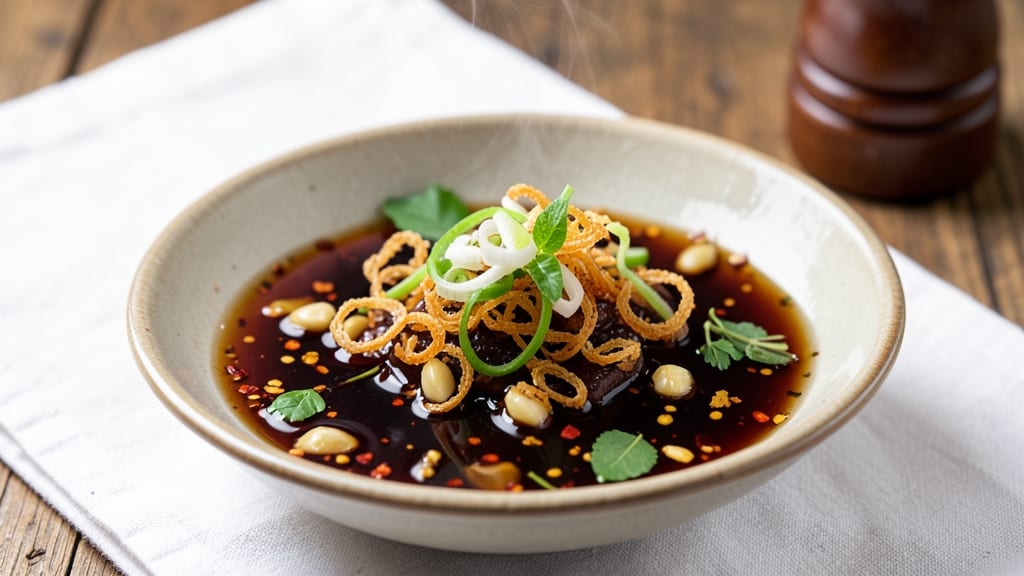
This bao dipping sauce recipe transforms simple ingredients into a velvety, aromatic sauce that elevates every bite of steamed bao. The secret lies in balancing garlic, chili oil, and soy sauce for a perfect harmony of umami, heat, and tang.
I developed this version after testing countless combinations—it’s the one that consistently delivers restaurant-quality depth with minimal effort.
What sets this sauce apart is the garlic chili oil base, which forms the rich foundation. We’ll build flavor by adding soy sauce for depth, rice vinegar for brightness, and a touch of sugar to balance the heat.
The sauce thickens slightly as it sits, creating that perfect silky texture that clings to bao without overwhelming its delicate filling. It’s simple to make but feels like a labor of love.
This recipe delivers bold, complex flavor in just 15 minutes—ideal for dipping, drizzling, or even as a marinade. The sauce keeps well in the fridge for up to a week, so you can make a big batch and enjoy it all week.
Whether you prefer it spicy, tangy, or slightly sweet, this versatile sauce adapts to your taste while maintaining its signature depth.
The key to success is fresh garlic and high-quality chili oil—never skip the blooming step where garlic sizzles in the oil. This creates aromatic layers that define the sauce.
For extra richness, a splash of sesame oil at the end adds another dimension. Let’s make this sauce—it’s the finishing touch your bao deserves.
Ingredients for bao dipping sauce
Eight ingredients transform into a velvety sauce that makes bao unforgettable.
| Ingredient | Amount | Notes |
|---|---|---|
| Garlic Cloves 🧄 | 6 cloves | Freshly minced, not pre-minced |
| Chili Oil 🌶️ | ½ cup | High-quality, not spicy |
| Light Soy Sauce 🥢 | ¼ cup | Kikkoman preferred |
| Rice Vinegar 🍶 | 2 tbsp | Seasoned for brightness |
| Granulated Sugar 🍚 | 1 tbsp | White or brown |
| Sesame Oil 🌿 | 1 tbsp | Toasted, for aroma |
| Extra-Virgin Olive Oil 🫒 | 1 tbsp | For balancing heat |
| Cornstarch 🌾 | ½ tsp | For thickening |
| Water 💧 | 1 tbsp | For cornstarch slurry |
| Red Chili Flakes 🔥 | ½ tsp | Adjust for heat preference |
The garlic is non-negotiable—freshly minced cloves release their full aroma when bloomed in oil. Whole Foods or Asian markets carry the best quality, but any grocery store works if you buy it within a week. For chili oil, Lao Gan Ma or Lee Kum Kee are my go-tos—they’ve got that perfect balance of heat and oiliness. The soy sauce? Kikkoman light soy is the gold standard, but any good-quality light soy will do. Skip the dark soy here—it’ll muddy the sauce’s brightness.
No chili oil? Mix 1 tbsp olive oil with 1 tsp gochujang for a quick substitute, though it won’t be identical. Running low on rice vinegar? Substitute apple cider vinegar at half the amount, but add an extra pinch of sugar to balance. The sugar isn’t just for sweetness—it rounds out the acidity and keeps the sauce from tasting harsh. Pro tip: if your sauce is too thin, mix cornstarch with cold water first—it dissolves better that way. For extra depth, a splash of fish sauce (1 tsp) adds umami, but it’s optional if you’re keeping it vegetarian.
This sauce keeps for up to 1 week in an airtight jar in the fridge. The flavors actually improve as it sits—give it a stir before using. For longer storage, freeze in ice cube trays and transfer to a bag. Thaw overnight in the fridge. The sesame oil adds aroma, but if you’re sensitive to it, reduce to 0.5 tbsp or skip entirely. Leftovers? Perfect for drizzling on noodles or even as a marinade for tofu—just don’t overdo it, or the bao will get soggy.
Why You'll Love This Recipe
- No-Fuss Pantry Staples: I’ll never buy store-bought again—just garlic, soy sauce, and vinegar. That’s it. The chili oil adds the oomph, and honestly? I keep this version in my fridge for lazy nights when I’ve got half a bao left over.
- Umami Bomb Combo: The garlic and soy sauce create this deep, savory punch that makes every bite of bao taste like a little flavor party. Add a splash of vinegar for brightness, and suddenly you’re not just dipping—you’re elevating.
- Weeknight & Weekend Ally: This sauce works for takeout nights (obviously), but also when I’m hosting and need something quick to tie everything together. Double the batch—it keeps for days, and I’ve used it for dumplings, grilled chicken, even as a quick marinade.
- Budget Magic Maker: A single jar of chili oil and a bottle of soy sauce stretch across so many meals. I’ve turned $5 worth of ingredients into enough sauce to feed my family for a week, with zero waste. (Yes, even on a Tuesday night.)
Step-by-step instructions for velvety garlic chili oil
This sauce delivers perfect balance—bold garlic, smoky depth, and silky texture every time.
Bloom the Garlic in Chili Oil
Heat the 0.5 cup chili oil in a small saucepan over medium-low heat. Add the 6 cloves freshly minced garlic and 0.5 teaspoon red chili flakes, stirring constantly. The garlic should sizzle gently without browning—this takes about 2-3 minutes.
Here's the thing—garlic burns fast. Watch closely until it turns golden and fragrant, not dark brown. The chili oil will carry the heat beautifully, but you want that sweet, aromatic garlic flavor to shine through. Remove from heat immediately after the garlic is perfumed.
Build the Umami Base
Return the pan to medium heat and add the 0.25 cup light soy sauce and 2 tablespoons rice vinegar. Stir to combine, letting the mixture simmer gently for 1-2 minutes until slightly reduced. You'll notice the aroma deepen as the vinegar brightens and the soy sauce develops its umami punch.
This is where the sauce comes together. The vinegar cuts through the richness of the chili oil while the soy sauce builds that essential savory depth. Don't rush this step—let the flavors meld for at least 30 seconds after the initial simmer begins.
Sweeten and Balance
Add the 1 tablespoon granulated sugar and stir until completely dissolved. The sugar will help balance the heat and acidity while adding a subtle caramel note. Keep the heat at medium-low and let the mixture cook for another 1 minute to integrate all flavors.
I like to taste at this stage to check the balance. If it's too sharp, a pinch more sugar helps. If it's too salty, we'll adjust later. The sauce should be vibrant but harmonious—bright from the vinegar, rich from the soy, and slightly sweet to round out the garlic's intensity.
Create the Silky Texture
In a small bowl, whisk together the 0.5 teaspoon cornstarch and 1 tablespoon water until smooth. Return the sauce to medium heat and slowly pour in the cornstarch slurry while stirring constantly. The sauce will begin to thicken immediately—keep stirring for about 30-45 seconds until it reaches a velvety consistency that coats the back of a spoon.
This thickening step is crucial for that restaurant-quality texture. If it thickens too quickly, add a splash of water to adjust. You want it smooth enough to drizzle elegantly but still cling to bao buns without being gluey.
Finish with Aromatic Oils
Remove the sauce from heat and stir in the 1 tablespoon sesame oil and 1 tablespoon extra-virgin olive oil. These oils add layers of aroma—the nutty toastiness of sesame and the mild richness of olive oil. Let the sauce sit for 2 minutes to allow the oils to fully incorporate and the flavors to meld completely.
Taste and adjust seasoning if needed. You might want to add a touch more soy sauce for saltiness or a splash of rice vinegar for brightness. The sauce should be complex—garlicky, slightly spicy, umami-rich, and perfectly balanced. Serve warm or at room temperature alongside your bao buns for that authentic street-food experience.
Pro Tips For Making Bao Dipping Sauce
- Mince Garlic Fine: The difference between a sauce that sings and one that just hums is how you handle the garlic. Use a knife instead of a press—slicing cloves lengthwise and mincing them into tiny, even pieces. Pressed garlic releases too much juice and burns faster, turning your sauce bitter before it even hits the pan.
- Bloom Soy First: Skip the urge to toss everything in at once. Heat your garlic in chili oil until fragrant (about 30 seconds), then immediately add the soy sauce and let it sizzle for 10 seconds. This step deepens the umami—no one wants a sauce that tastes like vinegar threw up on soy sauce.
- Balance Heat Early: Taste as you go, especially when adding sugar. If the chili oil is too aggressive, dilute it with a splash of vinegar first. I learned this the hard way—once I made a batch so spicy my friends reached for milk instead of bao. Adjust heat before sweetness, not after.
- Use Cold Vinegar: Pour rice vinegar straight from the fridge into your sauce—it cuts through the richness better than room-temperature vinegar. Warm vinegar mellows out too fast, leaving your sauce flat. Sounds weird, but it works: the cold shock keeps the tang sharp and the flavors crisp.
Essential equipment for this dish
Small Saucepan
This recipe works best in a small 1- to 1.5-quart saucepan with sloped sides—think Calphalon or All-Clad. The shallow depth helps prevent splattering when garlic blooms in chili oil. I’ve made this sauce in a nonstick pan, but I prefer stainless steel for better heat distribution.
A medium-sized saucepan (like the Ozeri Touch Control) gives you enough surface area to stir without crowding the ingredients. 🔥
Immersion Blender
If you want ultra-smooth texture without thickening, swap the cornstarch for an immersion blender like the Ninja Foodi 1200W. After combining all ingredients, simply blend directly in the pan for 10-15 seconds—no extra steps! This works especially well if you’re making a larger batch.
For best results, blend after removing from heat to avoid steam burns. The Magic Bullet also works for small batches if you prefer blending outside the pan.
Fine-Mesh Strainer
A fine-mesh strainer (like the OXO Good Grips) is my secret weapon for removing garlic bits if you prefer a silky-smooth sauce. After blooming the garlic, strain the chili oil through the mesh into a clean bowl before proceeding.
This step takes 30 seconds but makes a noticeable difference in texture. For extra refinement, line the strainer with a cheesecloth—just don’t overdo it, or you’ll lose too much flavorful oil. 💫
Digital Thermometer
For precise temperature control during the thickening stage, a digital instant-read thermometer (like the Thermoworks ThermoPop) ensures you don’t overheat the sauce. The ideal finishing temperature is 180-190°F—hot enough to thicken properly but not so hot it burns the delicate garlic and vinegar flavors.
I’ve ruined sauces by letting them boil too vigorously, so this tool is worth the $20 investment if you make dipping sauces often.
Small Whisk
A small silicone whisk (like the OXO Ambush) is perfect for combining the cornstarch slurry and stirring the sauce to a velvety consistency. The flexible silicone head prevents scratching your pan while giving you better control than a metal whisk.
For extra smoothness, I like to whisk the sauce off-heat for 30 seconds after removing it from the stove—this helps distribute the oils evenly. A mini whisk attachment for your stand mixer works too if you’re making a big batch.
Air-Tight Jar
Store your finished sauce in a small glass jar with an air-tight lid (like the Le Parfait 8-oz jars) to preserve freshness for up to 1 week. The glass won’t absorb flavors like plastic, and the tight seal keeps moisture out.
For longer storage, freeze in 1-oz portions using silicone ice cube trays—perfect for single servings. Label your jars with the date to track freshness. Pro tip: Let the sauce cool completely before sealing to prevent condensation from diluting the flavors. ✨
Nutrition facts
Frequently asked questions
Can I make this bao dipping sauce without chili oil?
For a milder version, replace the 0.5 cup chili oil with 0.4 cup neutral oil (like vegetable or canola) plus 1 teaspoon gochujang or sambal oelek. For extra depth, add 0.5 teaspoon smoked paprika to mimic the chili oil's smokiness. The sauce will still have umami richness but with less heat.
How do I adjust the spice level?
Start by reducing the red chili flakes to 0.25 teaspoon for mild heat. For extra spice, add 1-2 teaspoons of chili crisp or extra chili oil after cooking. If the heat feels overwhelming, balance it with 1 extra teaspoon of sugar or 1 tablespoon more rice vinegar to brighten the flavor.
Can I make this sauce ahead of time?
Yes! This sauce actually tastes better after resting. Store it in an airtight jar in the fridge for up to 1 week. The flavors meld beautifully, and the texture becomes even silkier. For longer storage, freeze in 1-ounce portions—thaw overnight in the fridge before using. Stir well and reheat gently if needed.
What if my sauce turns out too thin?
Don’t worry—thin sauce is easily fixable! Mix 0.25 teaspoon cornstarch with 1 teaspoon water and stir into the warm sauce. Heat gently for 1-2 minutes until thickened. If it’s still too runny, repeat with another 0.125 teaspoon cornstarch. For a smoother finish, strain through a fine-mesh sieve after thickening.
Can I use this sauce for other dishes?
This versatile sauce works perfectly for drizzling over noodles, marinating tofu or grilled meats, or even as a dipping sauce for spring rolls. For extra richness, add a splash of sesame oil or a pinch of white pepper. Just avoid using it on delicate seafood—its bold flavors can overpower more subtle dishes.