
Sauces & Condiments
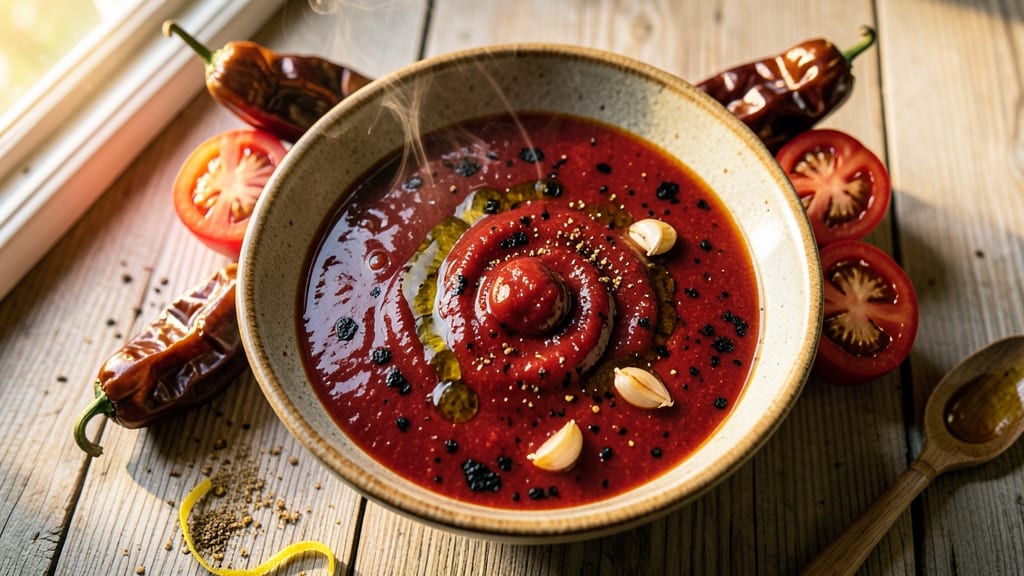
This Anaheim chili sauce recipe transforms smoky roasted peppers into a versatile condiment perfect for grilling, dipping, or drizzling over tacos. The secret lies in charring the peppers over an open flame, which unlocks deep, caramelized flavors that no jarred sauce can match.
I developed this recipe after years of perfecting the balance between heat and sweetness—just enough kick to linger without overwhelming. The process is straightforward but essential: roast the Anaheim peppers until blistered and blackened in spots, then blend them with tomatoes, garlic, and a touch of vinegar for brightness.
Simmering the mixture reduces it to a thick, glossy consistency that clings beautifully to food. The spices—cumin, oregano, and a pinch of cayenne—build layers of warmth that make this sauce a game-changer for any dish.
What you’ll end up with is a smoky, slightly sweet, and subtly spicy sauce that’s rich enough to stand alone but flexible enough to elevate everything from grilled meats to roasted vegetables. Unlike store-bought versions, this one delivers authentic depth and a complexity that comes from fresh, roasted ingredients.
The best part? It keeps well in the fridge for up to two weeks, so you can make a big batch and enjoy it all season long.
Whether you’re slathering it on nachos, drizzling it over grilled corn, or using it as a marinade, this sauce will become your go-to for adding smoky, spicy heat to any meal. Let’s get started—your taste buds will thank you.
Ingredients for anaheim chili sauce
Fresh roasted peppers meet aromatic spices for a smoky, versatile sauce that elevates everything from grilled meats to tacos.
| Ingredient | Amount | Notes |
|---|---|---|
| Anaheim Peppers 🌶️ | 4 whole | Fresh, medium-sized, charred over flame |
| Roma Tomatoes 🍅 | 2 cups | Chopped, vine-ripened preferred |
| Garlic Cloves 🧄 | 4 cloves | Peeled, roasted for depth |
| Extra-Virgin Olive Oil 🫒 | ¼ cup | High-quality, fruity variety |
| Apple Cider Vinegar 🍏 | 2 tbsp | For brightness and tang |
| Ground Cumin 🌿 | 1 ½ tsp | Toasted for aromatic warmth |
| Dried Oregano 🍃 | 1 tsp | Mexican oregano if available |
| Cayenne Pepper 🔥 | ½ tsp | Adjust for preferred heat |
| Salt 🧂 | ¾ tsp | Diamond Crystal preferred |
| Water 💧 | ½ cup | For thinning if needed |
The Anaheim peppers are the heart of this sauce—char them over an open flame until blackened in spots for that authentic smoky depth. Local farmers markets often have fresh ones, but the grocery store produce section works too. Look for peppers that are firm and vibrant, not soft or wrinkled. Pro tip: Roast the garlic cloves with the peppers—they’ll develop a nutty sweetness that takes this sauce to the next level. If you can’t find Anaheims, Poblano peppers are a great substitute, though they’ll be slightly milder.
No fresh tomatoes? Canned San Marzano tomatoes work perfectly—they’re sweeter and less acidic. The vinegar is key here; if you prefer a milder sauce, reduce it to 1 tablespoon. For extra richness, add 1 tablespoon of tomato paste when blending. The spices are non-negotiable for that authentic chili flavor—skip the pre-mixed taco seasoning though. Toasting the cumin in a dry pan for 30 seconds before adding deepens its flavor dramatically. And if you’re sensitive to heat, reduce the cayenne to 1/4 teaspoon or swap it for smoked paprika.
This sauce thickens as it cools, so start with a slightly thinner consistency if you plan to use it immediately. Store in an airtight jar in the fridge for up to 2 weeks, or freeze for 3 months in ice cube trays for single-serving portions. The flavor actually improves over time as the spices meld. I like to make a big batch in summer and keep it on hand for grilling all season. If it gets too thick, just add a splash of water or vinegar to loosen it up.
Why You'll Love This Recipe
- No-Chop Needed: The Anaheim peppers just roast whole—no dicing, no tears, no fuss. I toss them straight onto the grill or under the broiler, skin softening like magic while I chop tomatoes in two minutes flat.
- Smoky-Sweet Magic: That charred Anaheim pepper meets bright Roma tomatoes and a splash of apple cider vinegar? It’s the kind of balance that makes you pause mid-sip of water. The olive oil ties it all together—rich but never heavy.
- Game Day Starter: Drizzle it over nachos, toss it with roasted sweet potatoes, or serve it as a dip with tortilla chips. Honestly, I’ve even used it to wake up a sad bowl of rice—suddenly, it’s a fiesta.
- Makes More Than You Think: A single batch stretches across three meals: breakfast tacos, lunch bowls, and dinner grilled cheese. Between us, this sauce is my pantry’s unsung hero—cheap, lasts forever, and always delivers.
Step-by-step instructions for Anaheim chili sauce
Here's how to transform simple ingredients into a velvety, smoky sauce perfect for grilling or dipping.
Char the Anaheim Peppers and Tomatoes
Preheat your grill or broiler to medium-high heat. Place the 4 whole Anaheim peppers and the 2 cups chopped Roma tomatoes directly on the grill grates, turning occasionally for 8-10 minutes until they develop deep black char marks and soften slightly. You'll know they're ready when they smell sweetly smoky and the skins blister easily with a gentle press.
Here's the thing—charred skin adds incredible depth of flavor, but don't let them burn completely. If any pieces start to blacken too much, move them aside. Transfer the charred vegetables to a bowl, cover with plastic wrap, and let them steam for 10 minutes. This makes them easier to peel and releases their juices.
Roast the Garlic for Sweet Depth
While the peppers and tomatoes are charring, wrap the 4 peeled garlic cloves tightly in aluminum foil. Place them on the grill alongside the vegetables and roast for 10-12 minutes until the cloves are soft and golden brown. The foil traps the heat and creates caramelized, sweet garlic that will elevate your sauce.
Let the garlic cool slightly before squeezing it directly from the skins into your mixing bowl. This ensures you capture all that roasted flavor without any waste. I like to press the garlic with the back of a spoon to release every last bit of that sweet, jammy goodness.
Blend All Ingredients Until Silky
In a blender, combine the charred peppers (peeled), tomatoes (peeled), roasted garlic, 0.25 cup extra-virgin olive oil, 2 tablespoons apple cider vinegar, 1.5 teaspoons ground cumin, 1 teaspoon dried oregano, 0.5 teaspoon cayenne pepper, and 0.75 teaspoon salt. Blend on high for 1-2 minutes until completely smooth, scraping down the sides as needed.
This is where the magic happens—the combination of smoky char, tangy vinegar, and aromatic spices creates a complex flavor profile. If the sauce is too thick after blending, add the 0.5 cup water one tablespoon at a time until you reach a pourable consistency. You want it to coat the back of a spoon but still flow freely.
Simmer for Balanced Flavor
Transfer the blended sauce to a saucepan and simmer over medium-low heat for 10-15 minutes, stirring occasionally. This slow cooking allows the flavors to meld and develop. You'll notice the sauce deepening in color and becoming more aromatic as the spices release their oils.
Taste and adjust the seasoning—you might need a pinch more salt or cayenne to reach your preferred heat level. The sauce should be vibrant red with a glossy sheen. If it thickens too much during simmering, stir in a splash of water to maintain the perfect dipping consistency.
Cool and Store for Maximum Freshness
Remove the sauce from heat and let it cool to room temperature. The flavors will continue to develop as it sits. For best results, transfer to a clean jar and refrigerate for at least 1 hour before using. This chilling period allows the spices to fully infuse and the sauce to thicken slightly, giving you that perfect balance of smoky heat and tangy sweetness.
This sauce keeps well in the refrigerator for up to 1 week or can be frozen for 3 months. The longer it sits, the more complex the flavors become—perfect for grilling, dipping, or as a marinade base. You'll love how versatile this simple sauce is while packing so much flavor.
Pro Tips For Making Anaheim Chili Sauce
- CHAR THE PEPPERS FIRST: Anaheims need a good sear to soften their walls and deepen their flavor before blending. Hit them directly over medium-high heat—skin-side down—until blackened in spots (about 5-7 minutes). I used to toss them in whole, but now I halve them lengthwise first; the flesh releases flavor faster and you avoid undercooked bits lurking in the center.
- ROAST TOMATES UNTIL COLLAPSED: Roma tomatoes should be blistered and wrinkled before hitting the pot—this concentrates their sweetness and mellows their acidity. Cut them in half, drizzle with olive oil, and roast at 425°F (220°C) for 20-25 minutes, turning once. If they’re still plump, they’ll taste watery in the sauce. Trust the wrinkles.
- BLISTER GARLIC IN OIL: Raw garlic cloves can turn bitter in sauce. Instead of mincing them raw, heat 1 tablespoon olive oil in a dry pan until shimmering, then add whole cloves (peeled or unpeeled) and cook until golden and fragrant—about 2-3 minutes. Smash them flat with the back of a knife before adding to the pot; this releases their oils without burning.
- ACIDIFY LAST, THEN STRAIN: Add the apple cider vinegar only at the very end—after everything’s simmered and blended—to preserve its bright tang. Then, strain the sauce through a fine-mesh sieve lined with cheesecloth to remove skins and seeds. This step isn’t optional if you want a silky texture; I learned this after making a chunky, skin-strewn mess that looked unprofessional.
Health benefits of this recipe
Digestive Aid
Anaheim chili sauce contains capsaicin, the compound that gives peppers their heat. While it may seem counterintuitive, capsaicin actually stimulates digestion by increasing stomach acid production and promoting healthy gut motility. The garlic and tomatoes in this sauce add prebiotic fiber, which feeds beneficial gut bacteria.
I notice my digestion feels lighter after enjoying this sauce with meals—it’s like a natural digestive tonic. 🌿
Antioxidant Boost
The charred Anaheim peppers are packed with vitamin C and antioxidants like quercetin, which help combat oxidative stress in your body. Tomatoes contribute lycopene, a powerful antioxidant linked to heart health.
The extra-virgin olive oil adds polyphenols, which reduce inflammation. Together, these ingredients create a flavorful antioxidant powerhouse that supports long-term health.
Anti-Inflammatory Benefits
The cumin and oregano in this sauce contain compounds like eugenol and cumin aldehyde, which have been shown to reduce inflammation. Cayenne pepper adds capsaicin, which may help lower blood pressure and improve circulation.
I’ve found this sauce particularly helpful after intense workouts—it soothes muscle inflammation while adding a satisfying kick. 💪
Heart-Healthy Fat
The extra-virgin olive oil used in this recipe provides monounsaturated fats, which support heart health by improving cholesterol levels. Combined with the potassium-rich tomatoes, this sauce helps regulate blood pressure naturally.
The garlic adds alicin, a compound that may help reduce LDL ("bad") cholesterol. It’s one of those rare sauces where every ingredient works together for your heart.
Immune Support
The garlic in this sauce is a natural immune booster, containing allicin which has antiviral and antibacterial properties. Tomatoes provide vitamin A, essential for maintaining healthy mucous membranes. The apple cider vinegar adds probiotic benefits when consumed regularly.
This sauce becomes my go-to when I’m feeling under the weather—I feel like it gives me an extra layer of protection. ✨
Low-Calorie Heat
Despite its bold flavors, this sauce is surprisingly low in calories—about 30 calories per 2-tablespoon serving—making it perfect for adding heat without excess calories. The water and vinegar help keep the calorie count down while maintaining the perfect consistency.
It’s a great option for those watching their weight but still wanting flavor. Perfect for drizzling on grilled proteins or veggies!
Nutrition facts
Frequently asked questions
Can I substitute Anaheim peppers with other types?
For a milder sauce, use Poblano peppers—they're slightly sweeter and less spicy. If you want more heat, swap in jalapeños or serranos, but reduce the cayenne to 1/4 teaspoon to balance the flavor. The key is maintaining the same roasting technique for that essential smoky depth.
How do I adjust the heat level?
Start with the 0.5 teaspoon cayenne as written for a subtle kick. For more heat, add an extra 1/4 teaspoon and taste as you simmer. If it's too spicy, balance it with 1 extra tablespoon apple cider vinegar or 1 teaspoon sugar to mellow the burn. The roasted peppers naturally mellow over time, so don't worry if it seems intense fresh out of the blender.
Can I make this sauce without a grill?
Yes! Use a broiler set to high or a cast-iron skillet over medium-high heat. Place the peppers and tomatoes directly on the skillet and turn occasionally until charred. For the garlic, wrap it in foil and place it on the skillet alongside the vegetables. Just monitor closely to prevent burning—broiling happens faster than grilling.
What's the best way to use leftover sauce?
This versatile sauce works as a marinade for grilled meats, a dip for chips or veggies, or a drizzle over tacos and nachos. For extra flavor, mix 1 tablespoon into mayo for a spicy sandwich spread, or stir it into 1 cup sour cream for a smoky dip. It also makes an excellent base for homemade chili or soup—just thin it with broth. The possibilities are endless!
Why does my sauce look thin after simmering?
This happens when the sauce hasn't thickened enough during simmering. Reduce it longer over low heat (about 5-10 more minutes) or stir in 1 teaspoon cornstarch mixed with 1 tablespoon water to thicken it instantly. If you prefer a thinner consistency, that's fine too—just adjust to your preference. The sauce will naturally thicken more as it cools.